Wednesday, August 31, 2011

{Kraftin Kimmie} Mom's Card

Well, the kids are in the bathtub as I'm typing this post up, getting clean for their first day of school tomorrow. They are actually excited, so that's good! I think the new inside shoes did it! lol
Meet Lavender the Quilter, one of the gorgeous Moonlight Whispers over at Kraftin' Kimmie!
I have had this card half made (well coloured and cut out, as well as the circle die cut and embossed) for awhile now. It's my mom's birthday card. She is a quilter, so this fits her perfectly! She saw it in my stamp room the other day and asked 'Ooooo- will this be for my card??' Hahaha!!
I actually had to re-stamp and colour the quilt, as I had it in greens, but when I found the dp I wanted to use, it didn't work. So I stamped out another quilt, coloured it in blues/browns and glued it over the first one.
I used Kraftin' Kimmies sketch challenge for this week, designed by the very sweet and talented Michele Boyer (I swear I almost die every time she leaves a comment on the ol' blog! Go see her sample and you'll understand why) I altered it a tad (Lavender ended up being the rectangle panel;), and I replaced the little tag element with a crochet ribbon bow and brad.

Lots of sewing on this card...I think it's quite fitting being that the leading lady is stitching away (you would never catch me hand-stitching anything if I could help it! Nothing like my borderline psychotic mentor, Carole...who needs to up her meds if she loves it as much as she says she does...but that's just between us;) I love her, but sometimes she's crazier than a cut cat when it comes to that hand stitching, if you know what I mean! It's like saying you're crazy for bikini waxes, or cleaning toilets...just not right)
Notice how I accidentally cut my damask pattern so it's running the wrong way? Oh, and there was a 'dripping' incident on the dark brown part of the quilt, dead-centre...isn't it just lovely when the markers nib doesn't seem to be in there tight enough and you don't notice it till the ink blobs all over the image?
Here is a close-up...wish I could remember the hair combo on this one, because I like the way it came out. Hopefully I wrote it down somewhere!


And here is the inside. I used the matching MFT border die for the inside, more sewing and dp, and added the sentiment that comes with this set. See the little black speck under the 'Y'...no, that's not fly poop on your computer screen. It's ink. I must have pressed to hard on the pad and got ink on the rubber edge of the sentiment and stamped it onto the cream cs. Another NICE...Ah, homemade isn't perfect, now is it.


Supplies: Stamp- KK; Ink- memento; DP- MME; CS- SU!, Xpress blending card; crochet- SU!; antique brad- SU!; copics; Dies- MFT; Bigshot, sewing machine, thread, dimensionals- SU!

Tuesday, August 30, 2011

{MFTWSC34} Butterfly Birthday

Well, yesterday's beach day with the boys proved to be fun, but completely unrelaxing...like most days as a mother! My SIL, Mandi, met us there and the kids had a great time I think (short of a few meltdowns;). And we feel like decent mothers for making an effort, so I guess it was a win-win!
I was sure wiped last night though (the sand in the eyes didn't help my tired state)! I tried to put the kids to bed 1 1/2 hrs early...I really thought it was alot later than it actually was!
I did finish off this little birthday card that was commissioned. I already had the image coloured, so the card came together really quick! I used this past week's MFT sketch challenge for my layout.

I went with this little Pure Innocence cute, Butterfly Kisses, coloured her up with Copics and added a thin layer of stickles to her wings and the flower in her hair. A Martha Stewart punch was used to make the vertical butterfly layer, matted with olive CS. The little butterfly embellie is a Verve die, cut from 3 different papers and popped up for dimension, The 'body' is made from my favorite glitzy rhinestones by Stampin' Up! The 'Happy Birthday' sentiment is stamped on a Fancy Bracket dienamic (MFT).
Here is a close-up of the layered butterfly and you can see all the sparkle on those wings!


And the inside, using some little strips of scrap dp, and the butterfly border punch again. This sentiment is from another little PI, as is the 'Happy Birthday' on the front. I like that the fonts are all the same...allows for mix and match with your stamps!


If you want to play along with this sketch, there is still (barely) time!! Check out this thread on SCS to see more inspirtation!

I'll leave you with a picture from yesterday of my littlest boy, happy as a pig in $#*!.....he found this big hole in the beach that some kids had dug and filled with water. Of course it was warm and messy, just the way he like's it;) Look at the mud all over his face! Think he needs a haircut? lol!


Monday, August 29, 2011

{Aug SFYTT} Baking Agnes

Eek! Last semi-week before school starts! The kids go back on Thursday and my middle monkey will be starting kindergarten:( I am not looking forward to not seeing the boys for huge chunks of time....yes, the time I will have to spend with the baby 1:1 will be awesome, but I seriously miss the boys when they are in school. No, I don't overly miss them when I am on a beach in Mexico, sipping tropical drinks and soaking up the rays...but everyday life without them with me makes me sad. I am sappy I guess! I feel that they are only little for such a short time that I want to drag it out as much as I can!
On another note, my husband told me my blog is not as good as it used to be. I says huh?? Apparantly I was funny and now I'm not. Well, he was once young and good looking...and, well....
He likes reading about my little daily hang-ups and catastrophes...I am starting to wonder if maybe he's a closet sadist. I have nothing horrifying to report today, but cross your fingers honey, and maybe something traumatizing will happen later. The day is still young and I am heading to the beach with the boys, so that in itself is an invitation for trouble.
Onto crafting. My good friend, Trista, asked me to make a few cards for her. She gave me the general theme that she wanted based on the recipients interests. The first is a birthday card for a friend, who likes cooking and baking. I had this Kraftin Kimmie image, Agnes, coloured up from when I took my copics and a bunch of stamped images on a road trip this summer with the fam. I think I coloured her pretty good considering the old man's driving. Don't you just love Agnes' 'mom bum' and sport socks? Hilarious! Kraftin Kimmie is sponsoring Jen's SFYTT this month, so I used that sketch.


I used some MME dp ( I bought two packs of this 6x6 pack and the first one is almost gone!), TCP's icing cutup and seam binding, and used Jen's trick for matting brads/rhinetsones. My orange brads were getting lost on the dp, so I punched out circles of chocolate CS and layered the brads over top. Now they really POP!
Here is a closeup of the colouring:


And the inside:


So that's it for me! Off to the beach for one last day in the sun:) I have a few cards that I'm working on, as well as a big project for TCP that I'll be blogging about real soon, so stay tuned!

Wednesday, August 24, 2011

{Kraftin Kimmie} A Spooky Challenge

Hi everyone! I have been trying to play along with KK challenges for about 3 weeks now, but it seems I never quite get the projects completed, so I do have a number of images coloured, waiting for the next challenge that they might *fit*!
I was so excited by this challenge, because anyone who knows me, knows that I LOVE Halloween! My oldest son hates it, and my middle son is just like his mama and loves the decor, spooky stuff, costumes, etc! Ryan practically begs me not to put up decorations (trust me, if I didn't have kids, they would be the scariest I could find;) and Jake's in his glory! Apples and oranges, I tell ya;)
Now, I don't have any KK Halloween stamps (GASP!)...there is a little witch and a zombie girl that I'm dying for {groan}! But I am not one to shy away from a challenge, so I wasn't gonna give up that easy! Especially when I've been trying to participate for weeks!
This foxy little number, Joanie, has always struck me as trouble. And what could make even more
bad-ass you ask? Being un-dead, that's what. Yes people....get some more mileage out of your 'regular' stamps and spook them up a bit for Halloween! Just by using the right paper/accessories and colouring with different tones, you can morph sweet stamps into ghastly ghouls! I'll explain more on the colouring in a bit. Vampire girls are always beautiful and use their looks to seduce and captivate their prey....just when the clueless dude thinks they're coming in for a kiss, BOOM! They've gotcha by the carotid and you've been drained. Moral of the story- Never trust the beautiful ones;) lol!

I used some old SU! dp...loved this pack:( I think this was the last of the scraps....I coloured her with copics, going with an unusual colour combo on her skin (E000, E71, E74, G21) to give her that un-dead look. I also didn't blend it as much as normal, giving that mottled, sloughing look that a dead chick would probably have. Here is where I found a fun video on how to colour creepy skin. I also added some W3, 5 to her eyelids and under the eyes. And something I NEVER do is colour around the pupils...I just like the look of plain eyes better. But I decided to colour around the pupils with  YG copics marker to give her an extra-creepy appearance. Even dead, she was looking to pretty. I wanted the colours to be drabber and not the usual bright and vibrant, so I used a hair combo that I never have before either (E43, 44,47,49).


The moon  was made using sitcky sheet cut with a circle nestie and then ultrafine gold glitter was added. I straight and zigzag stitched with black thread, added adhesive purple rhinestones, black satin  ribbon and a halloween patterned paper flower.
The inside sentiment was computer generated and printed on white CS. I think it's kind of funny and suits the card..my hubby laughed, so that must mean I nailed it;)


I used this weeks MOJO Monday 205 sketch for my layout. It's also been ages since I've used a (current) Mojo sketch. Seems I'm always a few weeks behind with my mojo;)

Supplies: Stamps- KK; Ink- memento; DP- SU!, CS- SU!; dies- spellbinders, MFT (scallop), TCP- (pinking border); rhinestone- martha stewart; flower- recollections, ultrafine glitter; copics; sewing machine, thread, bigshot

Tuesday, August 23, 2011

{TCPTUES173} Please Feed The Bears

It's Tuesday, so that means it's time for another challenge from The Cat's Pajamas! Has there ever been a better reason to get inky on a Tuesday? I think not!! Tori, our colour connoisseur, is hosting this weeks challenge and she has come up with a spectacular colour combo for us to play with!
Have you ever seen such a delicious combination??? My creative pallette is watering;) If you are a fan of Stampin' Up cardstock like I am, then Marina Mist, Peach Parfait (or pumpkin pie) and Chocolate Chip are perfect matches!

I found this fun dp that I bought awhile back (American Crafts) and thought it suited the colours well, so I went with this super fun set Happy Camper. I thought it would be cute if PJ was holding some kind of sign with the sentiment on it, and then I thought that the squirrel would be a nice little helper with his little 'hands' ready to hang on to something and from that, the banner sentiment idea was born. Banners and flags are so trendy in the stamping/scrapbooking world right now!
I used a few of my beloved Cutup dies, Grass (using felt from the Green With Envy collection), cloud border (cut from the blue, embossed cs...I cut the clouds 'out' of the blue panel to show the white underneath- negative cutting), and the small Pennant Cutup for the banner.
Beige Linen Thread (currently out of stock) bows string the pennants together. Machine stitching, dry embossing, sponging and a twill knot and chocolate button add detail.
The animals and tree stump were coloured with copics (squirrel- W1,3,5,7  PJ- E34.35.37, YG93,95,97  tree- E77, 79, I think;) I used my colourless blender (0) to add the cross-hatching lines to the green on PJ's nose and tummy. Everyone was popped up on dimensionals.


For the inside, I used the negative cut of the felt Grass die and the positive cut clouds from the Cloud border die, along with more sponging and stitching.


Want to win some weekly catcash? It's easy! All you have to do is play along. Simply make a card using Tori's colour combo and link your creation up to Alma's blog or the SCS gallery using the keyword TCPTUES173. One person is randomly drawn each week and you could even be chosen as our monthly Swanky Stamper, where you will win stamps from the next release and have the opportunity to join the DT during sneaky peek week!

Friday, August 19, 2011

{TCPTUES172} Felt Flowers

Hi friends! I am back in blogland after a relaxing holiday with my mom:) Last night I whipped up this fun and fuzzy card for The Cat's Pajamas Tuesday challenge. Julie challenged us to use felt on our projects. Now I do enjoy felt, so this was a nice challenge for me...not too stressful;)
I am head-over-heals-in-love with my Cutup dies lately, so right away I knew I wanted to make a felt flower garden.

I used Easy Rosette (currently out of stock- guess y'all love it as much as me;), Sunflower Rosette, Flower Buttons, Grass and Mini Exotic Butterfly dies!
I cut two Easy Rosettes and used a running stitch, gathered to make a fluffy flower. The leaves were machine stitched to the paper down the center. The stems are made from ribbon. The sentiment is from the set Tweet Hearts, which I thought would be nice with the butterfly die.


The butterfly was cut once using the orange dp, once using espresso cs (cut with 1 cutting plate and 1 rubber impression pad- ensure you don't cut through the fine details on the wings) and once using brown felt, just cutting and adhering the body and wings. The butterfly is 'popped' off the page using a simple accordion folded strip of paper.


For the inside, I stamped another sentiment that comes with the set, and stamped it in espresso ink


Oh yeah- did I mention there is a HUGE summer clearance sale going on right now over at TCP?????
Three days only people! No time to waste! And don't forget, there is still time to play along with this weeks challenge...upload your felty creation to Alma's blog and SCS gallery using the keyword TCPTUES172.

Friday, August 12, 2011

{TCPTUES171} Kitschy Christmas!

Hey all! Real quick post for you today...I have to catch an early morning flight and have yet to start packing! Eeek! Oh well, I work better under pressure anyway:)
Jen is our TCP hostess this week and her inspiration challenge was this:

I obviously went with the very Christmas-y colour combo of red and green, a little brown (see the cinnamon sticks and craft boxes), took a button straight out of the picture and ! was very inspired by the beautiful ornaments. I wanted to make a very vinage, kitschy kind of card....think granny's stash of ornament from when your mom was a girl;) Loads of glitter, rosettes, tinsel...pull all the stops here!


I used the Easy Rosettes (both small and large rosette sizes), Snowflake and Home Tweet Home Cutup dies on the front, as well as the bird from Home Tweet Home on the inside. The word PEACE is stamped with Early Espresso ink using the Nightie Alphabet
A shot of the large rosette. I dipped the edges in glue, and then in chunky red glitter and set aside to dry while I made the rest of the card. A vintage Jenni Bowlin green button, threaded with silver elastic cord, and some crystal stick pins finish it off. It is hung with silver tinsel trim. The birdhouse from the Home Tweet Home cutup was inked and popped up with dimenionals, and hung with the silver cord and the heart was cut from red glitter paper and popped up for effect. A double row of stitching with red and brown thread add interest, as well as the embossing and inking on the main, vanilla panel. The letters were stamped pre-embossing. I love the mix of upper and lowercase together!

Here is a detail shot of the Snowflake die, cut from cs and two-sided stickey paper, and covered in german glass glitter. The small rosette is stacked on top and a gorgeous red pearl brad holds everything in place! This 'ornament' is hung with silver elastic cord.

The music on the inside again, was stamped with the dark brown ink. It's from the set The Tweetest Things (a completely non-Christmas stamp, but see the versatility of this set and coordinating die?). The sentiment is from the set Round The Chimney.

Check out Jen's blog for details on how you can win some serious prizes just by playing along with us this week!

Wednesday, August 10, 2011

YNS Birthday Blog Hop!


Today is a very special day over at Your Next Stamp...It's their second birthday! That's right folks, YNS is turning TWO!
In honour of the big day, Karen asked me to help celebrate and she sent me the cutest new release stamp! I had so much fun as July's Guest Designer, so I jumped at the chance to join in on the fun:)
This stamp is so darned FUN! I squealed when I opened my package and saw 'Big Present For You'....I love cute lil boy stamps (being a mama to 3 boys myself)!
If you have just stumbled across my blog and want to join in all the fun and games you can go to the start at Peggy's blog. If you have been hopping along and are arriving from Dana's blog then you are right on track!
There are also lots of amazing deals right now in the YNS store to celebrate and you don't need any code! The next stop on the hop is Jen's blog! Good luck and happy hopping!


I paper-pieced the present, popped up the lid and ribbon and added some copic shading and spica glitter pen to the ribbon as well. The little man is coloured with copics, sakura clear glitter pen added to the star on his shirt and highlights added to his cheeks and shoes with a white signo gel pen.


He was cut out with a spellbinders label die and the cs was inked with memento cantaloupe and tangelo while still in the die. I added colourful bakers twine to the balloons (handcut from the dp) and big red button. 
 I used the same label die for the inside, as well as banners cut from the dp. Pretty simple:)


I also made a fun little belated birthday card, using one of my very favorite YNS stamps So Sorry Donkey. He is the cutest lil donkey I have ever seen and isn't that sentiment hilarious!!!??? I LOVE it! There are so many people that I know that would get such a kick out of this card. I know I'll get lots of use out of this set!

I coloured Donkey with my copics and added some spots to his rump using my colorless blender. I inked up the edges of the image panel with memento ink and then went back with chalk ink to soften it a bit. Brown stitching makes such a statement on this card. I threaded two wooden buttons with brown hemp thread and anchored my banner sentiment with them. The sentiment actually comes as one piece, but I used scotch tape to separate them and my stamp-a-ma-jig to aline perfectly on the skinny banner die cut.


Here is the inside, using the second half of the sentiment. Again, inking and stitching tie the inside to the card front.

What is a birthday party with out games and some AMAZING prizes? Well we have a fun little puzzle for you to solve along the hop and when you do you will be entered into the draw for one of TWO amazing YNS prizes! Not everyone has a puzzle piece so you need to pay attention, and click on the puzzle pieces, and follow the directions as you find them along the way. [3rd party cookies must be enabled to do the puzzle] When you are done put them all together at the end of the hop for your chance to win! You have until Monday, August 15th at Midnight EST.

YNS Birthday Puzzle Piece


And here are the AMAZING YNS prize packages that Karen is giving away!


Supplies: Card #1- Stamp- YNS, sentiments (MFT); Ink- memento; dp- BoBunny; cs- SU!; twine: The Twinery; button- SU!; Dies- spellbinders, MFT (star border, bracket), TCP (big scallop cutup); dimensionals, copics, white gel pen (SU!), sakura glitter pen
Card#2- Stamp- YNS; Ink- versafine, colorbox chalk ink (creamy brown), memento (chestnut roan); dp- MME; cs- SU!; dies- banner (TCP-easy rosette); buttons- unknown; twine (unknown); dimensionals; foam tape; sewing machine, brown thread, sponge, copics

Sketches- card 1 (SSSC); card 2 (Aug SFYTT)


Friday, August 5, 2011

{TCPTUES170} Bad Bunny

Hi there! This week's challenge for The Cat's Pajamas is a sketch by Leigh. She calls this the 'Picture Ledge'. When I saw the regtangle panels on the ledge, I thought of present, so I intended on using the birthday bunny from this set. But guess what? I don't have it! Egads!! Must make order soon. So I thought 'what the heck' and busted out some Christmas paper!!
And here is my festive take on the sketch, using the wascally wabbit from the set Define Good:


I entirely coloured the image with copics, added a little spica pen to the package ribbons, CE to his nose and distressed stickles to the hat. I cut 'presents' from dp and tied bows around them using Divine Twine (oyster) and Seam Binding (aqua). The little tags were punched with an SU! punch and I used my copic multiliner to add the chicken-scratch writing:) Brads were added to the corners. All of the edges were sponged with chocolate chip ink. The 'mantel' is topped with a mantel runner cut from velvet paper- VERY COOL and cuts like buttah!- from the Inside Pinking Cutup die.


A big cherry button was threaded with beige linen thread. The inside was kept very simple with plenty of room for a seasonal message. Isn't this sentiment perfect for this rotten little rabbit? But how could you stay mad at him with that sweet face, even if he has gotten into the presents (sounds like me when I was little!!)....


Upload your creation to SCS gallery using the keyword TCPTUES170 and to Alma's blog for your chance to win prizes!

Supplies- Stamps- TCP; Ink- memento, SU- chocolate chip, early espresso (inside sent); CS- SU!, xpress it blending stock; DP- Webster's Pages; Die- TCP; twine, ribbon, thread- TCP; button- SU!; dimenisonals; copics; spica; multiliner; SU! tiny tag punch; Crystal Effects- SU!; distress stickles in Picket Fence; velvet paper; big shot

Tuesday, August 2, 2011

{MFTWSC31} Flower Girls

Ahhh, another bittersweet post....my last WSC as MFT's Guest DT for the last month:( It's been a real slice and I've been honored to be amongst the best in the world of stamping! Thank you so much to Kim (The MFT Lady) for her generosity, as well as the DT for being so warm and welcoming, and to all of you for your wonderful comments on my blog during the last few weeks! You don't know what it means to me:):)
Now enough with the sappy! On to the crafty!!

Here is my card, using three sweet Pure Innocence girls. 'Poppy' and 'Sunflower' are newly released tonight, and 'Rose' was released a few months back!


I coloured them all up with copics, making them all look unique with blonde, red and brown hair. I pieced their dresses using scraps from my bin, added some spica pen, crystal effects, tiny rhinestones on the shoe buckles. The outer two panels are popped up on dimensionals, and the center is flat. This allowed for the flowers to overlap on the middle panel without touching.
In place of the circle on the sketch, I made a bunch of felt flowers, using the new Retro Rolled Flower dienamic and the Mini Rolled Roses and original Rolled Rose dienamics. You'll also notice the new Fancy Flourish dienamic!


Here is a shot of the inside. The Fancy Flourish die adds some interest, along with a strip of marina mist satin ribbon (SU!). The sentiment is from the triple scoop set All Smiles. I used one of my favorites from the set (love the handwritten font that is incorporated into each sentiment) 'Sending Happy Thoughts'.
A little tip with these delicate diecuts- I run them through my xyron and that basically turns anything into a sticker. All you have to do is peel off the backing and adhere! Much easier and less messy that applying glue:)


So, thanks again to everyone at MFT for such a fun month!
Jenny

MFT Blog Hop

Tonight is release night over at My Favorite Things! Have you got a 'Want List' a mile long? If you don't, there must be something seriously wrong, and I suggest immediately booking an appointment with your therapist;) lol!
Tonight the DT and myself  are having a fun little hop to showcase the new sets and dies one last time before they're released to the public for all your stamping pleasure (man it's fun being grouped with such an amazingly talented bunch of gals... I'm thinking of Wayne and Garth... "I'm not worthy, I'm not worthy;).
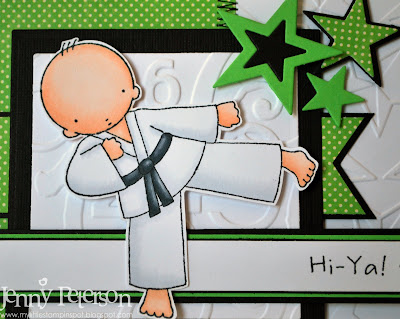
I used the PI Karate Kids and made a fun little set of cards!


This, my friends, is about as CAS as I can get!! I used ONE (Gasp!) patterned paper on each of my cards, black and white CS, along with the red and green CS for the girl and boy card, respectively.


I used the brand new Fancy Flourish dienamic and cut one black die, and cut it in half, using it on each side of the flower cluster. I also used the Mini Rolled Rose dienamics and cut red, black and white felt roses. Black satin ribbon and black brads add interest. I stamped the sentiment 'Pow!' (from Karate Boy set) three times on the tag. I love how these sentiments can be used for both kids- they are totally NOT gender specific ane I think that's great:)

For the inside of the card, I embossed the white CS (same as on the front) and used the Layered Label dienamic for the sentiment.


For my second card, I again tried for a clean and simple look (hehe!), colouring Karate Boy with copics. These kids are so quick to colour, the only shading on the shirt and pants was with C1 and 0 colorless blender! I used assorted C's for the belt, and E000, E00, E21 for the skin. Don't you just LOVE his little kicking action!

 Two different embossing folders (number and stars) were used on the cardfront, black zigzag machine stitching, black brads in the corners and a Stacking Stars dienamic cluster make up this card!


Again, I used the Layered Label dienamic on the inside and one of the cute sentiments that comes with the set.


Well, I hope you got a 'kick' out of my little Karate set;) If you want to see a complete list of designers participating in tonights hop, head over to Kim's blog. And then get on over to the MFT store and fill up your cart!
Thanks for stopping by!
Jenny


Supplies- Stamps- MFT; Ink- memento; DP- jillibean soup; CS- SU!; brads (small- SU!, large- stash), ribbon- SU!; felt- MFT; dies- MFT; dimensionals; embossing folders- cuttlebug; square punches- SU!; black thread, sewing machine, bigshot, copics

Sketches- MOJO 198, 201