Wednesday, July 27, 2011

{TCPTUES169} Girl, You're Going Places!

What have you been up to? I have been happily spending time in my stamping room, feeding my withdrawls with tons of stamping, colouring, cutting, glittery fun:) And of course throwing loads of laundry in and out of the washer and dryer when I get the chance;)
This week Susan is our hostess for The Cat's Pajamas Tuesday, and she has a stamp challenge for us! Use any kind of TRANSPORTATION themed TCP stamp on your project and you'll be elidgeable to win our weekly prize!
 I used my favorite, floppy-earred friend again this week. Man I love me some TCP bunnies!

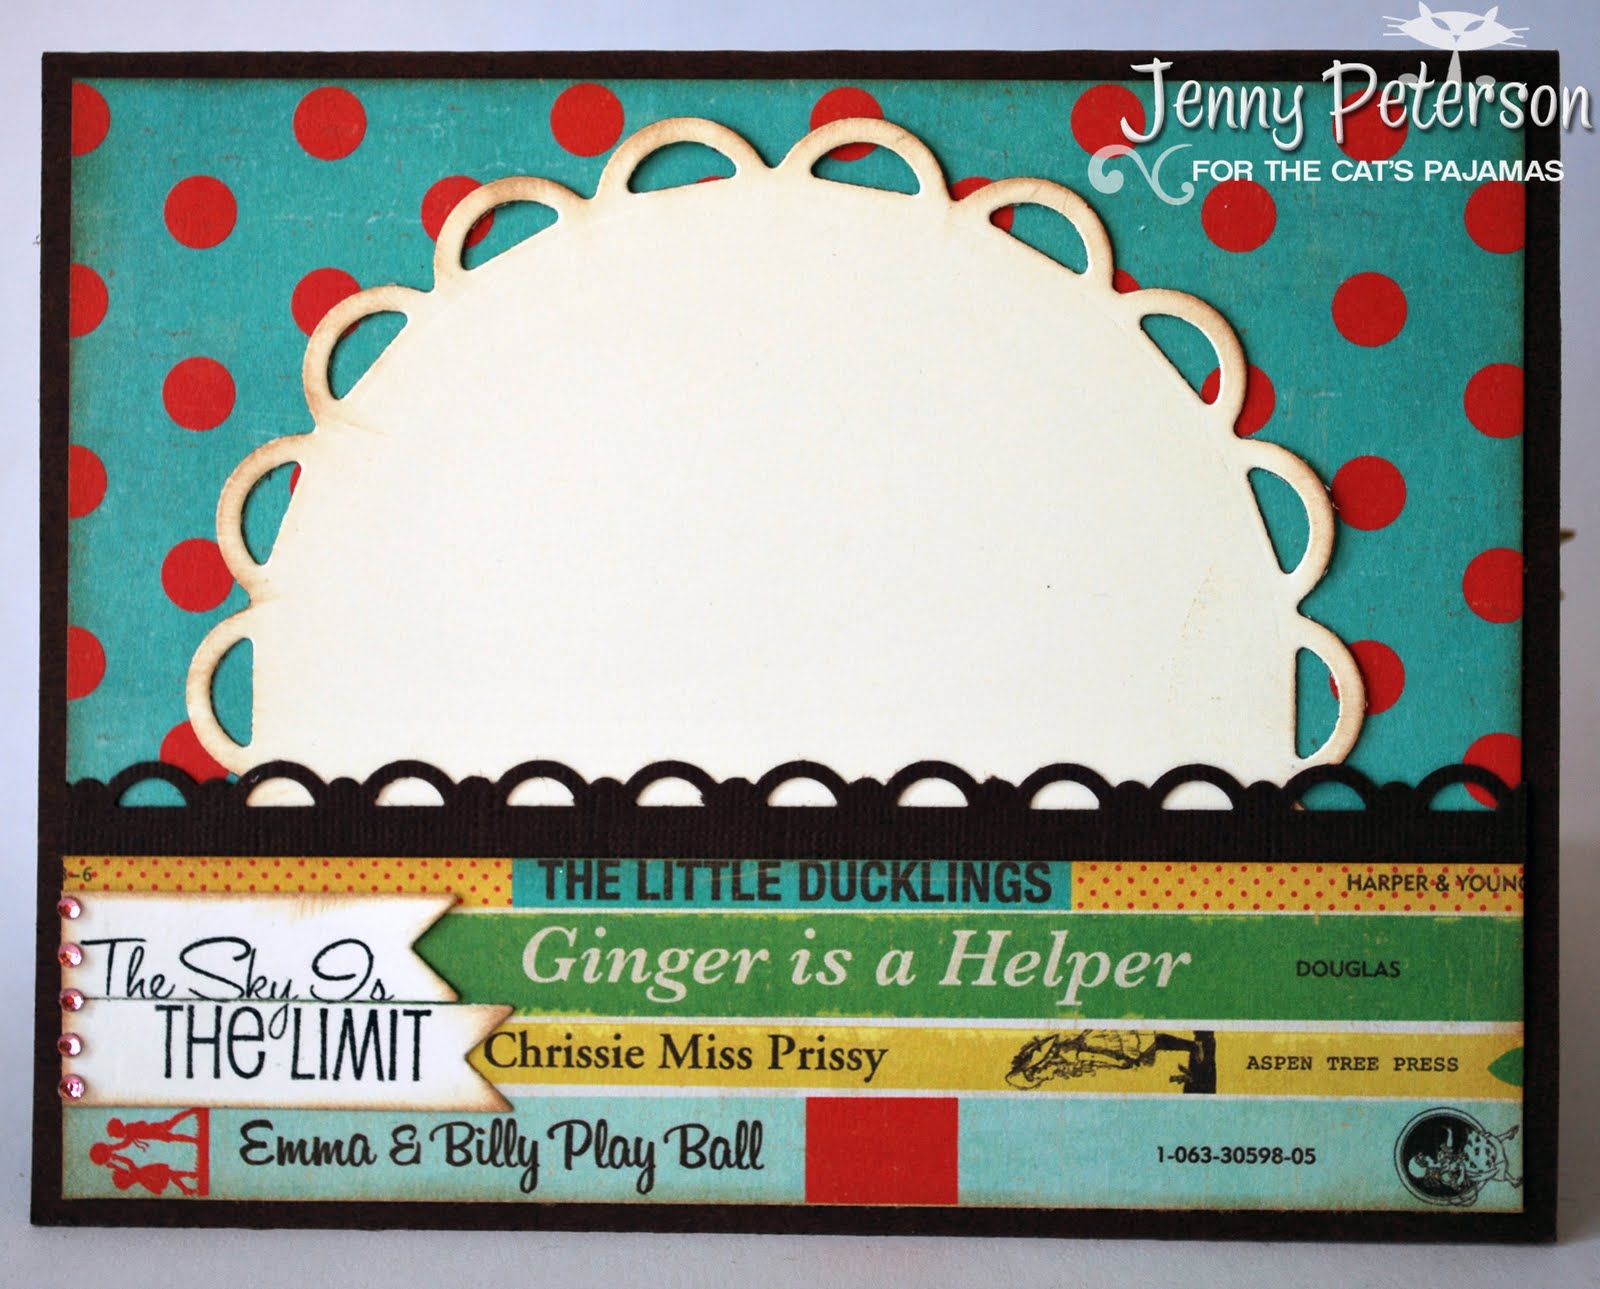
I wanted to go really 'girly' with this card, and I'm pretty sure the goal was achieved;) lol! It's not your typical travel-looking card, but I'm just the kind of kid that likes to throw ya for a loop once in awhile...keep my peeps on their toes;) I used CratePaper's Emma's Shoppe line and chocolate chip CS for my papers. Everything is inked with Colorbox Chalk Ink in Creamy Brown for a vintagey look. I used a lacey circle nestie to die cut my main circle panel and turned the Cloud Border Cutup upside down, using the back side (NOT THE CUTTING SIDE- this is the important part! Unless you want to cut right through the paper, which would not give you an embossed look;) to dry emboss clouds on the blue dp. I then cut another lacey circle and adhered them together, staggering slightly for a doily effect. I cut some clouds from cream CS and inked the edges, adhering them to my circle panel (one flat and one popped up with dimensionals). The sentiment flag is cut from the Easy Rosettes Cutup die, as is the sentiment on the inside (it's cut in half and the wide sentiment is stamped on the stacked flags). I added some tiny pink rhinestones on the flag, as well as on the hot air balloon.

The image (from the newly released set Away We Go) was stamped on xpress it blending paper, coloured with copics with basket-weaving added using my colourless blender. The really fun part of this card was making the glittery balloon, and it was really easy too! I stamped the balloon section of the image on double sided sticky paper using Stazon ink (regular ink smears all over and you need to have the lines visible). I then cut the balloon out, and carefully peeled the bottom backing off (you need the top still in place to see the stamped lines of the image). I adhered it down over my CS balloon image. Then, using my craft knife, I cut the lines on the top layer of the sticky paper. I peeled every other strip off of the balloon and added Barbara Trombley's Microfine Art Glitter in Romosa (pink). I burnished it with my fingertip (the oils from your skin actually help this glitter to get extra-shiny and there is no risk of it flaking off- makes it great for this technique!) I then did the same with the remaining strips, only this time I used Poupon (yellow) glitter. You also don't have to worry about 'cross-contaminating' your glitter colours...once the glitter is burnished, it will not fall off the paper and find it's way into the wrong colour jar!
If you are interested in a photo tutorial (sometimes it's just hard explaining things in type;) just leave it in the comment section of the post and I'll see what I can do! It was such a fun technique that I've been wanting to try for awhile now, so go ahead and twist my rubber arm and I'd likely do it again for my loyal readers;)


It's really nice and shiny IRL! I wish you could see the shimmer:) This picture better does the glitter justice, but still no comparison to up close and personal;) These are the only 2 colours I have in this glitter and after using it, I am positively in LOVE and can't wait to get more!

Okay, now it's your turn to get your 'gears turning' and make something using your TCP Transportation stamps! Need some more ideas? Head over to Alma's blog for some inspiration and details on the challenge:)


Sketch- MFTWSC26

{MFTWSC30} Best Bugs

Hey all- I'm back from my little spur-of-the-moment vacay with my hubby and our boys. We decided to pack up one day last week and a few hours later we were into our road trip! The only thing I forgot was my middle sons clothes! Bahaha!! PJ's, undies, shirts, shorts, trunks, EVERYTHING!!! It was all nicely placed in piles on his bed, ready to go into the suitcase...Sigh! In my defence, I only had a couple of hours to get us all ready to go. Oh well, some new clothes don't hurt every once in awhile;)
Stamping, oh how I've missed you. You are like a drug to me, a bad bug that I just can't kick! Speaking of bugs, I'd like to share the card that I made for the 30th My Favorite Things WSC!!
I've always had the idea to use these two PI's together on a card and I recently bought the cutest little box of Lindor 'Bugs and Bees' themed chocolate boxes for a friend, so I thought 'Now's the time!!' And I made her a matching card:)


I won't get into too much chit chat today- we got home so late that I am already quite late in getting my post up (dang traffic and construction was NUTS!). I used PI's Honey Bee and Lady Bug and coloured them with copics. The sentiment is something I made on the computer and cut with a tag spellbinders die. I used OA's 5 & Dime collection designer paper, SU black satin ribbon, hemp twine and buttons from my stash. Major inking with colorbox chalk ink in toffee and machine stitching with a cream thread add interest. I used MFT's Jumbo Scallop Die for the scallop layers in the sketch.
I am such a deviant little stamper...I intend to follow sketches but I always seem to do my own thing near the end without even meaning too!!! Haha! I meant to use some fun dienamic for the flower portion of the sketch, but the ribbon/button/tag combo would not be ignored! The voices in my head are quite demanding at times;)


Thanks for stopping by! Check out the MFT blog for some inspiration and more details on how to join us this week and perhaps win some cash!

Friday, July 22, 2011

{VLVJUL2011} Welcome Baby Boy

Today I have a card that I initially made for the Get Your Diva On challenge for Verve Stamps, but I misread the deadline and didn't have it done in time. Luckily, I made it using the Viva La Verve sketch for July, week 3, so it still qualifies for something.
My mom asked me to make her a baby card for her friends daughter, who just had a little boy. The GYDO challenge was to use a gift card and make a fun project surrounding that. I LOVE BabyGap and have always had a soft spot for their little brown teddy, and I have been waiting for the right time to ink up To The Moon stamp set, so this was a match made in Heaven! lol
As I said, I used the VLV sketch for this one, making it a standard sized card with a spot on the inside to place the GC.


I used some old SU! dp and silver and shimmer white CS (the GC is sparkly white IRL). Floral Circles die set  flowers were cut from green and brown felt, and an SU! chocolate button threaded with hemp twine was attached. I used spellbinders tags to cut the sentiments in two different sizes and used them in place of the leaves on the sketch. The bear is coloured with copics (E25,27,29) and popped up on dimensionals to look like he is peeking out the window. A SU clip 'hangs' the frame.
I embossed the silver circle panel with a cuttlebug folder, matted it with Not Quite Navy CS and adhered the flower and tag embellie. Machine zig zag stitching with chocolate thread finishes it off.


Thanks for stopping by!

Wednesday, July 20, 2011

{YNS Challenge #47} 3-2-1!

(***** If you're looking for my MFTWSC29 post, scroll down!*****)

Hey there my stampy friends! It's time for another Your Next Stamp Challenge! And the challenge is to use a recipe...that's right, I said recipe. Not to long ago I was totally unfamiliar with a 'card recipe'. Now I know- you have to have so much of one thing, a dash of another and a pinch of something else! In the case of this weeks challenge, the recipe is: 3 embellishments (can be 3 kinds, 3 of one kind, whatever), 2 patterned papers, and 1 stamped image! Follow this simple recipe and it will yield you one terrific card;)


I used the adorable Elli Loves Gardening. I coloured up with copics and cut the image out with an oval nestie, matting it on a orange CS scallop oval nestie. Silver and clear Spica glitter pen was applied to the watering can and tool, her overall buckles, and the flowers. I used a Martha Stewart trellis punch, distressed it with some toffee ink, backed it with olive CS and placed a green ruffled gingham ribbon strip just under the bottom edge. I used some BasicGrey dp that look kinda retro for my 2 patterned papers. I zigzag stitched in brown thread, attaching the dp's together and straight stitched around the main panel. My three embellies used were (1) butterfly diecut, (2) button, and (3) ribbon.

I cut the butterfly twice, once from patterned paper and once using olive cs. For the cut with the CS, I did not use both cutting pads in my bigshot, instead using one cutting pad and one silicone mat and shims to get the outside to cut, but not the fine details in the wings. Clear as mud? I then secured the back of the green wings with score tape to make sure none of the small bits accidentally got popped out. I ran the patterned butterfly through my xyron to make it sticky and adhered to the green butterfly. I threaded a little snippet of hemp twine through the button to look like antenae and attached to the butterfly with hot glue.

 For the inside, I kept the theme going, and used a cute MFT sentiment about butterflies. I distressed the edge of the stamped oval with the toffee chalk ink again.

So what do you think? Ready to make something of your very own using this recipe? Link up to the YNS challenge blog for your chance at winning some free rubber! Are you the winner of last weeks blog hop candy? Check here to find out!

Sketch- MFTWSC27

Tuesday, July 19, 2011

{WSC29} Girls Night In!

Man, I am having so much fun with these MFT sketches! They are fun and unique and I can't wait to see what you all do with them this month! Todays sketch got me really excited because I got to ink up a stamp set that I have loved for ages, yet has NEVER seen ink! Gasp! I know. It's sad, but true. I have loads of stamps that have never been used. I am a wee bit of a collector I think!
So here is the sketch, which I turned on the side.

I used WTG Chick Flick for my card, coloured both girls' hair and shirts with copics, as well as the popcorn, floor and couch feet. The couch and pants are paper-pieced. I used some crystal effects to give the bowl a glass look. The panels are all machine stitched with red thread. I used MFT's simply scallop dienamic to cut the black scallop vertical border. In place of the flower embellishment in the sketch, I used the ticket accent stamp in the set, paper-piecing one ticket and colouring the other with warm grey copics, stamping 'Admit One' in black ink. I also added a red button threaded with black & white bakers twine. For the sentiment, I broke up one of the phrases, stamping the first half on the front and the second half on the inside, using scotch tape to mask.


I stamped the sentiment in black ink and the 'treats' in sahara sand ink (a nice, warmish gray ink). More sewing finishes it off.


Wanna play along? Every week you have a chance to win an MFT voucher. All you have to do is create a card using this weeks sketch and upload it to the SCS gallery using the keyword MFTWSC29. Can't wait to see what you make! Thanks for stopping by!

Supplies: Stamps- MFT; Ink- Memento tuxedo black, SU! sahara sand; CS- SU!, xpress; DP- Simple Stories; Button- SU!; Bakers Twine- TCP (black licorice); crystal effects- SU!; sewing machine; thread; copics; dimensionals; glue gun

Monday, July 18, 2011

{TCPTUES 168} Colour Challenge

What an creative title for this post, dontcha think?? It's all I could come up with..it was sooooo hot today and I was sweating making this card even! I mean, the fussy cutting was hard, but not that hard;) lol
Today Tori has a wonderful new colour combo to inspire you and get your creative juices flowing....And what could be juicier than a big ol chunk of watermelon? This palette got into my head I think, as I made watermelon salad for lunch, in between making this little ditty!
There are lots of watermelon salad recipes to be found online, but here is mine:
Tear up a plateload of fresh, garden lettuce. Top with heaps of cutup watermelon. Sprinkle on feta or soft goat cheese and almonds (toasted or not- whatever you like). Drizzle with raspberry walnut vinegrette or whatever kind of dressing you fancy. That's it!!! So simple, yet so refreshing, light and summery:)
Wanna see some stamping now? Okay, here it is. Enjoy!


I used this sweet, little floppy-eared bunny from TCP's last release (Kick Some Grass), coloured him up with my copics (see ya later watercolouring!!!) and ever so carefully cut around each and every flower, whisker and blade of grass with my craft knife.Yes, it takes alot longer, but the results are worth it! Tiny green rhinestones were applied to each flower center.
I found this new designer paper that I am absolutely in LOVE with! It's called 'Simple Stories'. One of the journalling block thingys that was on one side of the 12x12 sheet had this little tree and the watermelon red that I wanted, so I decided that it would make a fun little background for a scenic card. I used my craft knife to make 2 slits on the tree trunk and fed my double layer of Cutup Grass through the holes, so the tree looks like it's in front of the grass. I did a double row of wonky machine stitching around the panel with red thread. The gorgeous orange ribbon is TCP's new seam binding in Mango and it's taped and folded in half (I needed a narrower strip) and tied in a double bow. I put the bunny up on dimensionals and 'planted' him in the grass.

For the inside, I used another piece of dp, matted in olive cs and machine stitched. I stamped the sentiment 'Smile' in black ink and dotted the 'i' with another green rhinestone. Lots of room for a nice note to a friend on this one:)

I bet you are just dying to play along with this weeks challenge! Well, we love seeing what TCP fans can do with their stamps, so get your fingers inky and join in on the fun! You could win weekly cat cash, as well as the chance to be crowned our monthly Swanky Stamper and have the opportunity to help us out with the next release! Can't win if ya don't try, right?
Link your creation up to Alma's blog or to our forum on SCS using the keyword TCPTUES168.

Saturday, July 16, 2011

The Places You'll Go!

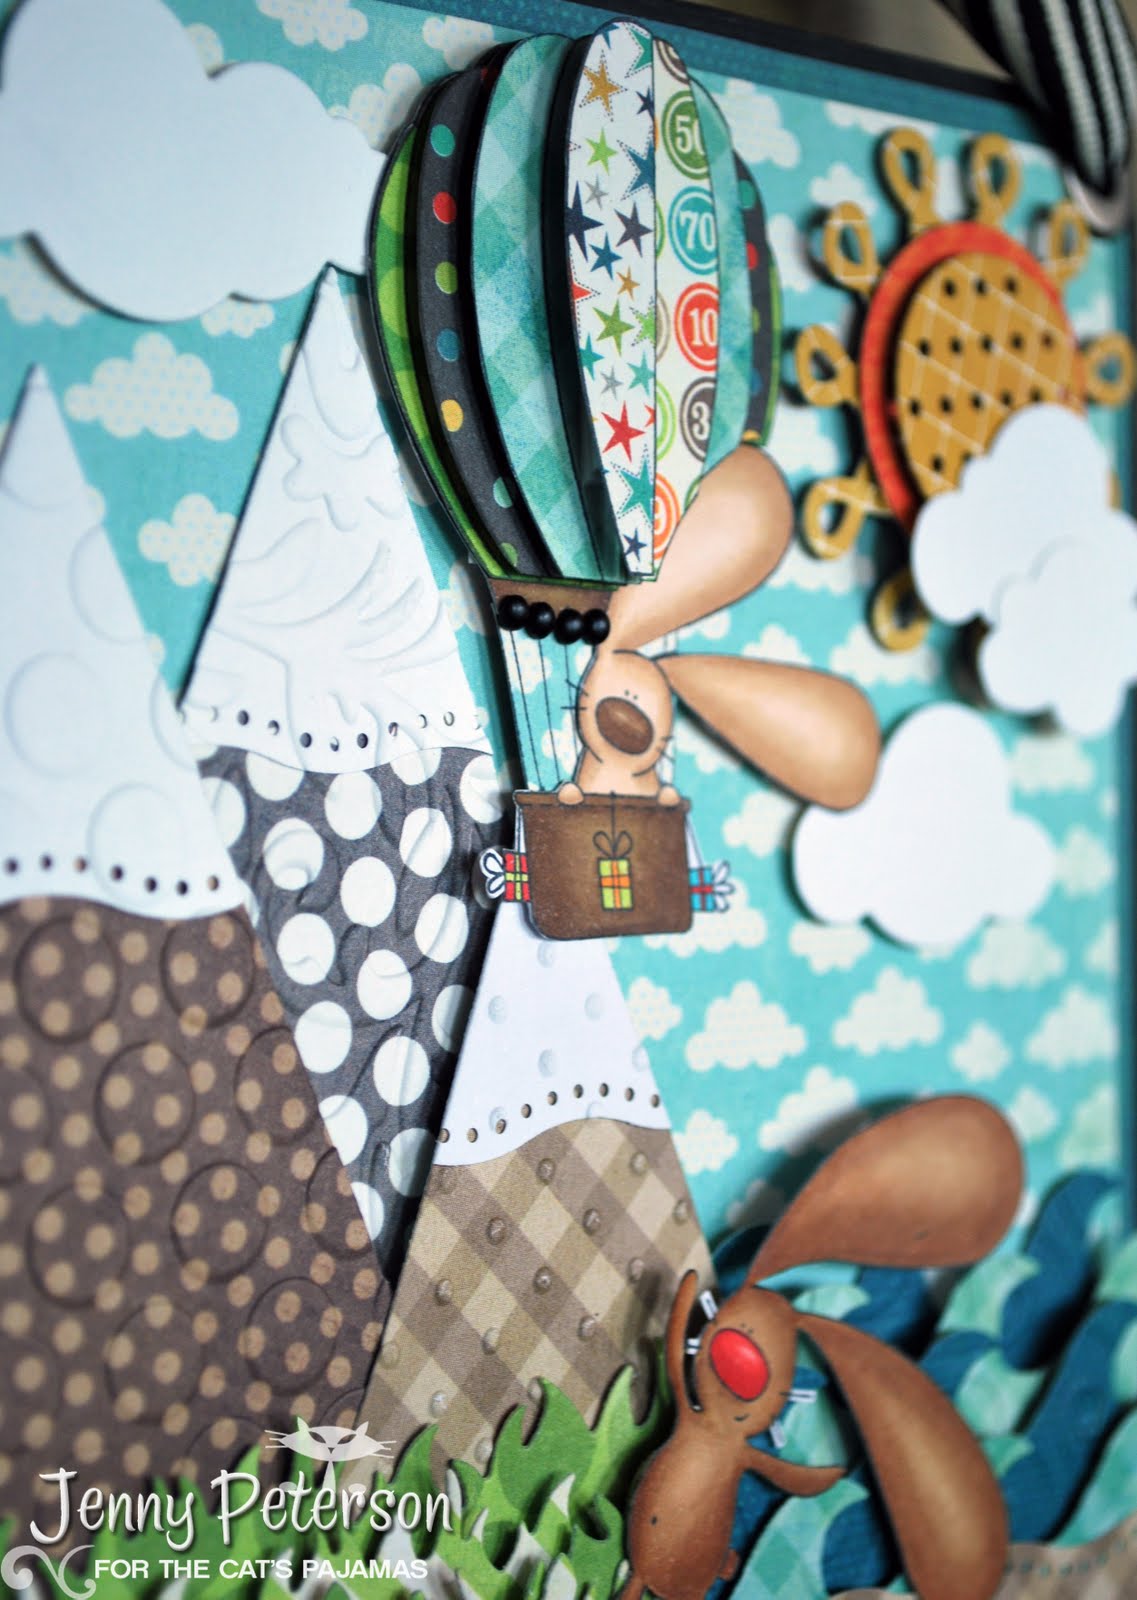
Hey friends! Thought I'd share some projects that I made for The Cat's Pajamas new release PJ Party that I made a few weeks back. This little wall hanging was one of the projects that I showcased at the SCS party and I forgot haven't gotten around to blogging about it (thanks for the reminder Jackie!).

I made this for my littlest guy, Hayes. His room is pretty un-themed, whereas my bigger boys have a cowboy room and a nautical room. I used the newly released sets 'Flutter By' and 'Away We Go', as well as numerous Cutup dies to make my little scene (Pennant, Cloud border (currently out of stock), Grass, Apron, Sunflower Rosette, Wave).


Tons of texture and dimension on this little project!! As you may have noticed, the little guy on the ground is the 'Flutter By' bunny, minus the butterfly net (I simply didn't ink that portion of the stamp)...I thought he really looked like he was waving to someone up in the air, and the idea for this pairing was born;) Plus the hot air balloon bunny looks like he/she is looking down at something, and I really loved how this turned out! There were a few bumps in the road with this one, like the joining of the sea and land, but I placed the bunny over the 'crack' and all better:)
I used the larger of the Pennant dies to make the mountains, just cutting off the bottoms for different heights, and cutting just tops for the peaks (I embossed with different folders for some fun texture). I cut the Cloud Border into individual clouds and placed them flat and on levels of dimensionals for depth. The sun is made using the Sunflower Rosette die. I placed a shim in my 'sandwich' to increase the pressure and the raised dots on the center flower became perforated so you can see the orange layer underneath (a punched circle). The rays around the sun is actually the Apron cutup die, adhered to the back of the circle with score-tape and curved around the edge. I used many strips of Grass and Wave cutups, all with dimsionals and foam tape, giving each layer more height than the previous (there is so much height, that I actually had to cut a strip of CS and adhere it around the waves and grass, along the sides and bottom of the plaque so you couldn't see all the layers of paper and tape!)
I used baby-braddies on the balloon, and layered up the balloon quite a bit as well. Wide, striped twill  ribbon through large antique eyelets allow for hanging on the wall.


Other supplies not mentioned above- Copics, MME dp, EK Success punch (used for 'sand' and snow peaks), ribbon and eyelets (SU), CS- xpress, SU, brads- MFT