Tuesday, June 21, 2011

TCP Sneaky Peeks- DAY 1

Oh My!!!! It's here! Sneaky Peek Week begins today! Today the DT are previewing the wonderfully adorable set 'Take Off'...this release has so many great new sets and this is one of my faves! It is so 'little boy' and I have three little men in my household, so any boyish stamps are right up my alley!


I spy with my little eye......a new cloud border die! Isn't it just the greatest! So versatile and different! And you are definately not limited to using is as a border. Here I have cut off one of the larger clouds with my paper snips and used it on it's own to house my sentiment (actually, only part of the sentiment- I put the other half on the inside using another snipped cloud). The sky panel behind the bunny was airbrushed using the cloud border as a mask. See how versatile?! I did the same on the inside. I love the realistic look of it!
I paper-pieced his plane, coloured him with copics and applied glaze to his goggle lens, nose and propellor (which was stamped twice and layered with a dimensional in between to give it some depth).


Okay peeps! Come back tomorrow for another peek and check out Alma's blog for a complete list of designers previewing today!

Supplies: TCP- Stamps- Take Off; Dies- Cloud border Cutup
Other- CS- SU!; DP- CosmoCricket 'Lil' Man' collection; Ink- memento; Copics; Nesties- oval, deckled oval; Crystal Effects- SU!, Copic Airbrush System; dimensionals- SU!; Olive big brads; sewing machine, thread, bigshot

Friday, June 17, 2011

Bathing Brigitte

This weeks Kraftin Kimmie challenge is solid gold, baby (said in my best Austin Powers impersonation;)...24 krafty karats to be exact!! That's right- use GOLD on your project.
I used some subtle gold SU CS and gorgeous prima guilded flowers, as well as some buttermilk spica pen to accent my gold-ish colouring.
I used the bathing beauty Brigitte. She is living the good life I tell ya! Nothing better than a hot bubble bath in my books!

I was wondering what stamp I should use for this challenge, when I remembered the lovely Brigitte, who has sadly never seen ink before:( I actually had to mount this one before I got to stamping!) I thought to myself that if I ever had a clawfoot tub this is probably what it would look like, with brass feet and fixtures....so the card was born. No layout. No idea what I would do. I didn't even have paper picked when I coloured her! I NEVER do that!! Just kinda went with it and threw it together, finding flowers in my stash as I went along! And the dp was from the worlds ugliest pack of paper, but the colours seemed to be working, so in it went with the rest of the heep! Don't you just love when you can find a purpose for that ugle piece of paper?? It makes me feel like a genuine good person, like the equivalent of adopting a kitten from a shelter. Something no one wanted that you gave a home to. Well, maybe no quite like that;) lol
Here is a closeup of the bubbles (they really do look like bubbles- distressed stickles is the trick with that), and you can see the faucet, but it doesn't look super glittery gold in the pic. IRL it's great! Trust me. I am a saint (as demonstrated with the ugly paper incorporation). Oh yeah- and I glazed the tub with Crystal Effects. I think I am seriously addicted to that stuff!! I need to go into a 12-Step program for it.....it's getting pretty bad.


Okay peeps, I was doing some rad tricks on the trampoline, trying to show off for my boys, and I did a sad flip and pretty well landed on my head. Needless to say, I am 'grounded' for awhile with a pulled neck muscle....the kids thought I was the coolest and didn't even realize the pathetic gymnast that I really am, God love 'em!! Their love is unconditional:) So I think i will be resting tonight and then this weekend guess what I'll be doing.......
That's right my friends- The TCP release is just around the corner and sneaky peeks start Tuesday, so I am a busy kitty for the next few days!


Are You In It To Win It?


Did you have a chance to check out the Wednesday Tutorial, right there on the front page of Splitcoaststampers? Our very own Amy Rohl created an awesome tutorial using one of the stamps from our next release on June 28.

We've had so many of you ask about it, that we've decided to give it away!...along with the other stamp sets in the release...like the one we are showing above.

Want to win something?! All you have to do is comment on this thread at SPLITCOAST. And it can be about anything. The tutorial, techniques you like to use, some you'd like to see, the weather. Anything you want.

Then each day during our Sneaky Peek Week, starting on Tuesday June 21, we'll randomly choose a winner from the comments on this thread. The winner will win the set that we are Sneaky Peeking that day.

And all you have to do to win is comment! The more comments the better. Easy Peasy.

Ready? Set? Go!

Thursday, June 16, 2011

TCP ATC Blog Hop!

Hi there TCP fans! How'd you like Julie's ATC (artist trading card)? Pretty cute, huh? This swap was my very first ever and first time making these ATC sized little cuties (2.5 x 3.5). Everyone's cards were so jammed packed full of TCP goodness...so many layers and textures! Amazing I tell ya! So you should have arrived here via the fabby Ms Julie Masse, one of the talented Cat Packers, and if you didn't, go back and start at the beginning! Trust me, you don't want to miss a thing on this little hop:)


This little card has some serious layers going on! First, I think PJ kinda looks like he's waving and I thought he's look sweet waving out a window, so I cut a window from the woodgrain dp using a rectangle spellbinder and then cut small strips to run horizontal and vertical. I attached acetate to the back to get the genuine window effect, and made a PJ sandwich, with him and his honeypot between the window and 'wallpaper' dp. The window box is perched up to make room for all PJ's beautiful flowers (cut from felt using the grass and flower button Cutups). Some yummy divine twine and a big orange/red button were strung around the window box. The little sign was made using the deckled rectangle spellbinders, inked up a bit and 'hung' with linen thread and a baby brad nail:)


Next on the hop is the uber-talented Megan Lock! Thanks for stopping by!
Jenny

Wednesday, June 15, 2011

Inch by Inch

Hello!! Happy Hump Day! I am off to Edmonton today with my MIL and SIL for a day of kid-free lunching, MIL's Dr appointment, and maybe IKEA (fingers crossed on that one!)....really I'd take any kind of shopping...Hmmmm, just thought of the Gap outlet store that's on the way out of town! lol
Thanks to my other SIL for watching all kids (with my kids, mandi's kids, her regular day care kids and her own son- it might be a hairy day!!!) We owe her!!
So on to my card! I used the Card Positioning System sketch and My Favorite Things is this weeks sponser. I have been wanting to use this WTG Gardening Girl for quite awhile and I knew the exact paper (cosmo cricket's Garden Variety) that I would have to use, so I went diggin' in the paper stash and found it right away! Nothing worse than knowing what you want, and that you do have it, but never being able to find it:( Totally sucks the mojo right out of you. And no matter how good the finished card is, you know it would have been WAY better with the 'right' paper!
Here is the sketch:


Okay folks, not alot to tell here, so I'll make it quick. First of all, I rotated the sketch to make it work for my horzontal image. I coloured her with copics, paper-peiced her shirt, glazed the boots and tomatoes and popped up the gardening box on boosters. Added some red satin ribbon and bow, and topped the bow with an orange button, which I 'threaded' with a tomatoe brad! I added some texture to the yellow panel using a SU! embossing folder.
Here is a close up of the image. I am giving this card to the lady who owns the greenhouse where my mom works. She is super nice and gives me staff discount even though I never have, or never will work there:) She is just one of those plain nice people! I think that it's a great card for greenthumb like her- and she is a crazy talented, knowledgeable horticulturist! Some of my friends were chatting on the weekend at my sons party and I heard one girl say that it's like harps playing and angels singing when you open the door to the main greenhouse! lol And her tomatoe plants are the hardiest:)


I really love the way this card turned out! The bright colours just make me happy- and it was so quick to put together too- Bonus! Thanks for stopping by! I might have something fun to show you tomorrow (fingers crossed!!!)

Monday, June 13, 2011

{TCPTUES163} CAS for once!

Hey all!! Well, my weekend company is gone and I took down the air mattress and reclaimed my stamping room! This week over at The Cat's Pajamas, our one and only colour queen Tori, has given us some yummy colours to work with:


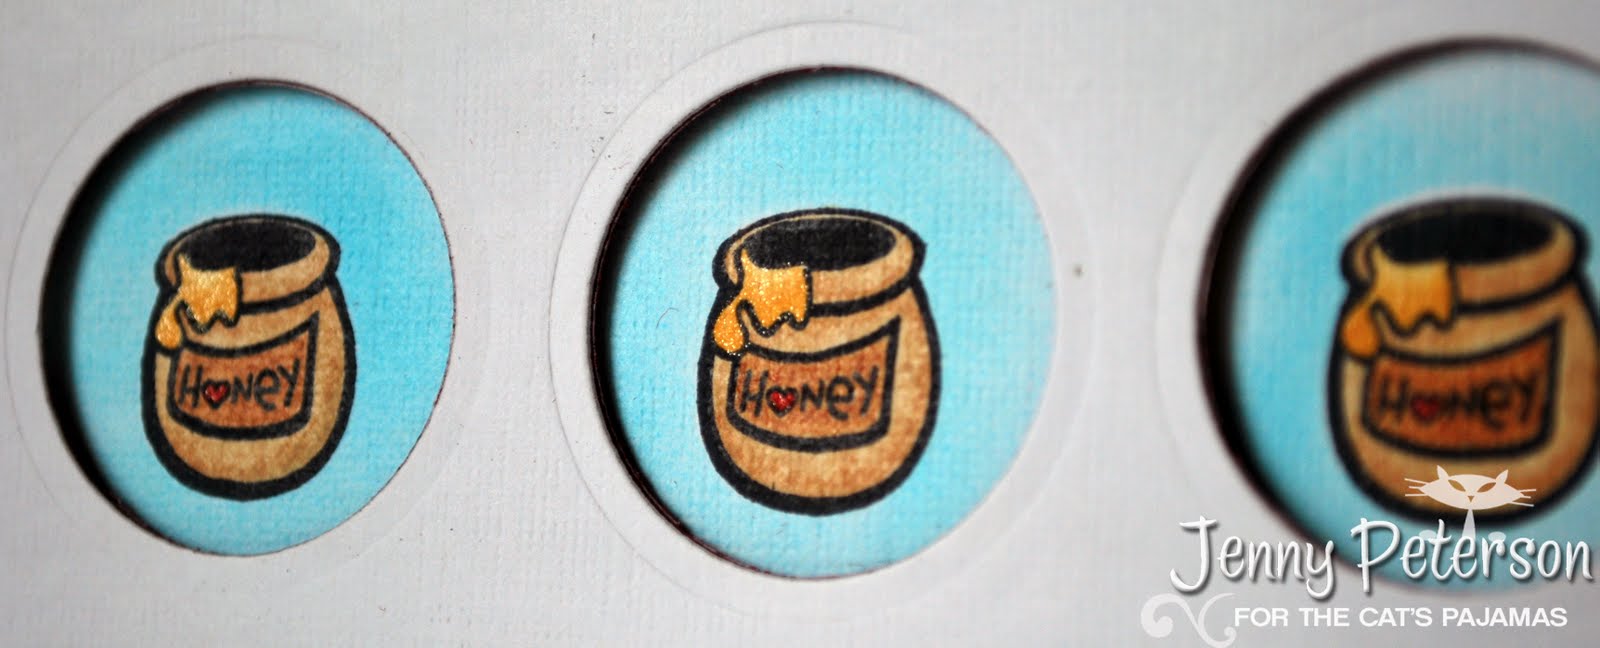
And if you can believe it, I went with a CAS (clean and simple) card! I used some smaller images from Honey Bear. I used a small circle nestie and cut 5 circles in a white CS panel matted with red CS. I then traced around the inside of the circles lightly with pencil on the card base, so that I would know exactly where to stamp my images. I then stamped the honey pot and bee in memento ink, coloured them with copics, masked them and airbrushed around the images with BG01 sketch marker. I added buttermilk, red and clear spica to the hearts, honey and bee heart wings. I cut a ribbon label die and airbrushed it while still in the die to keep a white border and stamped the sentiment with black ink. Some pink satin ribbon, felt hearts cut with the Heart Trio Cutup die and a pink button tied with aqua bakers twine finish it off! And you'll note the dimension on the next picture- I attached the front, cut out panel with foam tape to make it stick out further than the base.


Get going over to Alma's blog to get the deets on how you can play and win some weekly cat cash! It's just so easy! And with a new release right around the corner, a little money in your Sprinkle Saving Account wouldn't hurt!

And remember how I mentioned that we were going to have my middle son and hubby's birthday party this paet weekend (hence the overnight guests).....well here is a pic of the cake I made Jake and another shot of him with the cake....i made fondant for the first time and had about 4-6 meltdowns friday night. I do not like it. Not one bit. From here on in, it is traditional buttercream icing for this mama. And my dad asked what the heck was with the leather icing??! Thanks dad! I nearly went mad making the darned stuff, so any critism by the guests was not taken well;)


Friday, June 10, 2011

{TCPTUES162} Fur & Fabric

Hey everyone- I'm back from a few days off from stamping! I was wiped from MFT previews and have been cleaning my stamping room to make room for the blowup mattress bed thats going up tonight...we have company for the weekend for my son and DH's birthday party, so the spare room and stamp room will be occupied! This is going to be a quick post, I have to make a  batman cake this morning and then busy busy busy!!
So the challenge from Julie this week was to use fabric on your card...totally fun, right?? I had a bit of a plan forming in my head right from the get-go, but this was another one of those cards that takes control and you have no idea what you're going to be left with at the end!! I wanted to make a denim/fabric flower embellie that could be clipped off the card and used as a brooch, hair/hat clip or whatever, which I did. But soon realized it was waayyyyy to big for the card. So I made a second, smaller embellie and attached that to my card and kept the big flower on its own. With me?
Here is a pic of them together:


A little bit of info for you:
I used PJ from the set 'A Cuppa' and the sentiment from 'Toni's Tea Set'. In place of the steam line coming off of Pj's cup, I ran a line of glue and applied tiny twinkle rhinestones (painful, but a nice touch). I used an assortment of fabrics for my project: (1)denim for the flowers, apron, and on the card as a border, using the Icing Cutup die.  (2)Cord on the apron and cut for the center part of the clip flower using the smallest of the Easy Rosette cutup die. (3) SU cotton fabric on the flowers, and (4) hot pink netting on the card (pleated using score tape) and the center of the flowers (hand cut). Plus the SU dp has a material/ sewing pattern theme, so I thought that was kinda fun! I also used 3 different ribbons and trim.... And the brads are fabric!
Looking at it hurts the eyes a bit (I think I went overkill on this one)..it's pretty gawdy, but sometimes thats okay if you're in the mood for the 'more is more' project! lol!!

If you are interested in how I made my flowers, just leave a comment and I'll put together a photo tutorial early next week!! It's super easy and only requires a gluegun- NO SEWING!!

Check out Alma's blog on how you can play and have the opportunity to win some cat cash!
Thanks for stopping in!
Jenny